



OEM Phone Case Sample Approval Checklist: What to Verify Before Mass Production
Before approving an OEM phone case sample, verify its fit on the exact handset, everyday operation, materials, appearance, branding and packed configuration. Record the evidence against agreed criteria, close revisions, and identify the sample version that can proceed to production. A short “looks good” message leaves too many decisions open.
The practical output is an approval package: a retained sample, a controlled specification, a completed review record and a separate production inspection plan. This checklist explains what to put in that package and how to handle the awkward cases, such as a correct shell with the wrong finish or a revised button that solves one problem but introduces another.
Define what this sample is allowed to approve
Ask how the sample was made before examining it. An appearance mock-up, a hand-finished prototype and a sample made with intended production tooling can answer different questions. Record any temporary materials, manual trimming, substitute components or unfinished packaging. Approve only the features the sample actually represents.
Give every sample a unique identifier. A useful label includes the project, case SKU, exact phone model, color, revision and date received. Keep the label with the sample rather than relying on a courier box that may be discarded. When several people review it, use the same identifier in every photo and comment.
Separate the physical reference from the specification
The approved physical reference, sometimes called a golden sample, is useful for feel and appearance comparisons. The written specification defines the required construction, drawing revisions, dimensional tolerances, finish references and test methods. Neither document should silently override the other. Agree which requirement takes precedence if a measurement and the reference sample disagree, and resolve the conflict before release.
Keep matching, identified references with the buyer and factory where practical. Record how they will be stored and when they must be replaced or checked for deterioration. A scratched, faded or stretched reference becomes a poor basis for deciding whether a new batch is acceptable.
Use a checklist that records evidence, not just ticks
The table below is a suggested purchasing review form. Replace general criteria with your project’s drawing references and agreed limits. For each result, record pass, fail, not tested or not applicable, together with the reviewer and date. Explain every not-applicable decision. A blank result remains open.
| Check | Acceptance criterion to agree | Evidence to retain | Result / issue ID |
|---|---|---|---|
| Sample identity | SKU, handset variant and revision match the review scope | Sample label, configuration list and receipt date | Pending |
| Fit and retention | All corners seat; installation, removal and retention meet the agreed method | Handset model, fitted photos and handling record | Pending |
| Buttons and controls | Controls operate as intended without sticking or unintended activation | Function checklist, video and any specified force measurements | Pending |
| Ports and openings | Specified plugs and accessories fit; required openings remain usable | Cable/accessory identities and close-up photos | Pending |
| Camera and screen clearance | Approved drawing and protector compatibility requirements are met | Measurements, protector identity and camera/flash comparisons | Pending |
| Material and construction | Named grades, components and assembly match the specification | Material declarations, component list and applicable reports | Pending |
| Color and surface finish | Match the agreed physical reference under defined viewing conditions | Reference ID, inspection conditions and measured results if required | Pending |
| Logo and artwork | Correct file revision, placement, size, color and readability | Artwork proof, measurements and finished-sample photos | Pending |
| Performance claims | Pass the agreed protocol for each intended claim | Method, sample IDs, test conditions and complete results | Pending |
| Packaging and labels | Correct product, model, quantity, barcode data and artwork version | Packed sample, scan record and label proof | Pending |
| Revision closure | Every required correction has been checked on the current revision | Issue log, before/after evidence and retest references | Pending |
| Production release | Approval scope, remaining restrictions and inspection plan are agreed | Dated sign-off linked to the order and specification | Pending |
Check the case on the exact device
Fit, buttons and connector access
Use the intended handset for final functional review and record its full model designation. A dimensional dummy can support an early geometry check, but cannot confirm microphone performance, camera behavior or charging. Similar screen sizes are not evidence that two phone variants use the same case.
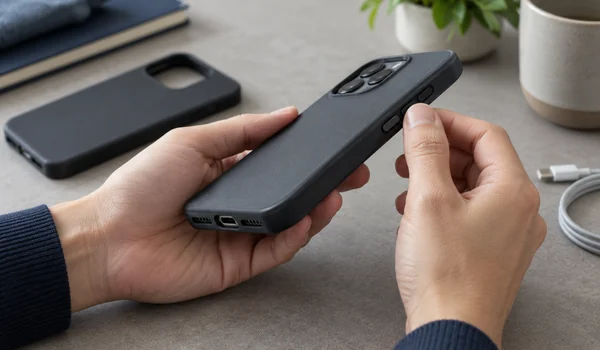
Install the case using the intended method. Look for a lifted corner, bowed sidewall, loose edge or liner that bunches against the phone. Remove and reinstall it under an agreed procedure, then repeat the fit checks. Note whether installation leaves marks or displaces any insert.
Check every relevant control with the case fitted: power, volume, switches, dedicated camera controls and stylus access where present. A button must return normally after release. Test the cables and plug housings that the product is meant to support; a hole can look centered while still preventing a larger connector from seating fully.
Camera, screen protector and moving parts
Inspect camera and flash openings on the assembled phone. Compare photos taken with and without the case under the same conditions when checking for visible obstruction or reflections. Measure any specified screen or camera lip from the defined reference surface. Do not substitute a generic “raised edge” description for a drawing requirement.
If screen-protector compatibility is part of the offer, identify the protector used and check its edges after fitting the case. For a foldable design, inspect the intended open and closed positions, hinge movement and any adhesive-mounted sections. Record interference rather than forcing the assembly into place.
For Apple-device projects, consult Apple’s accessory design resources and device drawings. Apple directs accessory developers to follow its guidelines and test prototypes. Use the applicable device information as a design input; a supplier’s sample approval does not itself establish Apple certification.
Approve materials, finish and branding as a finished assembly
“TPU,” “PC” or “silicone” alone leaves the material specification incomplete. Record the agreed grade or controlled material reference, hardness where relevant, colorant, coating, liner and bonded components. Ask which details remain provisional. For a material-selection discussion before this stage, see the TPU, PC and silicone comparison.
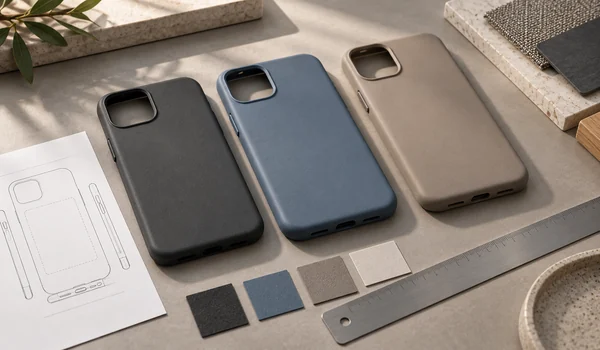
Compare color against an identified physical reference under agreed lighting and viewing conditions. Phone photos are useful for locating a blemish, but camera settings and screens make them unreliable as the sole color standard. If instrumented color acceptance is needed, agree the measurement method, location and limit before judging the result. The same applies to gloss, texture and transparency.
Inspect edges, seams, molding marks, dust, bubbles and coating coverage. Set cosmetic viewing distance, lighting and inspection zones so the buyer and factory are judging the same thing. Boundary samples can illustrate an acceptable mark and an unacceptable one, provided both are labeled and formally agreed.
Match the logo to the released artwork file. Check dimensions and position from specified datums, not a vague instruction to “center it.” Review small lettering, contrast and distortion around curved surfaces. Any rub, adhesion or wear test needs a stated method and acceptance criterion; rubbing once with a finger is only an informal observation.
Agree test conditions before accepting performance claims
List the claims intended for packaging and sales pages, then assign evidence to each one. Drop protection, scratch resistance, coating durability and yellowing resistance need different tests. A visually correct sample cannot validate all of them.
For any performance test, record the sample quantity and revision, preparation, equipment, procedure, environmental conditions and pass/fail limits. A drop evaluation also needs the device or surrogate, drop orientations, surface, height, sequence and damage criteria. If a standard is cited, identify its edition and the applicable procedure. Avoid a broad “military-grade” statement unsupported by a relevant report.
Keep tested and untested samples separate. A case used for destructive testing should not become the untouched appearance reference. Preserve failures and the full report, including exclusions, rather than keeping only a photo of the best result.
For a magnetic model, attach the approved phone-and-accessory compatibility record to this package. Detailed charging and attachment checks belong in the OEM magnetic phone case compatibility guide. Reopen the affected tests if the reviewed construction changes.
Review the packed product before closing the sample round
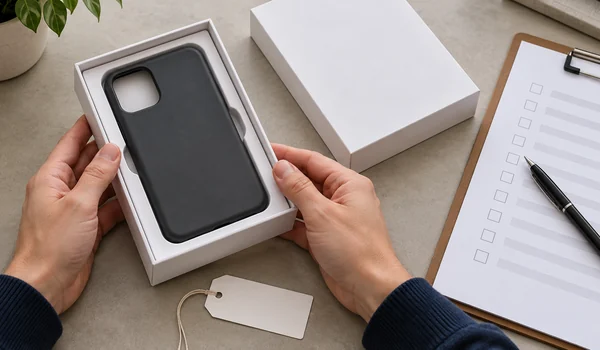
Request the case in the intended retail packaging, with inserts, protective films and labels. Confirm that the model name and color on the box match the enclosed item. Scan the barcode and compare the returned data with the approved SKU record. A successful scan only confirms readability; the encoded identity still needs checking.
Inspect how the case is restrained and whether packaging rubs a visible surface or presses on a moving part. Check opening and repacking if returns or retail handling matter. For shipping-performance requirements, agree a separate packaged-product test appropriate to the distribution route.
Review warnings, compatibility statements and care instructions alongside the product claims. Required market documentation should apply to the actual material and configuration ordered. Do not treat an unrelated report or a logo printed on a box as evidence for this sample.
Close revisions with a traceable decision
Use one issue log rather than corrections scattered across email, chat and annotated photographs. Each entry needs an issue ID, sample revision, requirement, observed difference, requested correction, owner and evidence needed for closure. Give the supplier a chance to confirm the proposed correction before another sample is made.
For example, “the charging opening is too small” is incomplete. A usable entry identifies the approved connector, shows where its housing contacts the case and asks for a revised opening that preserves the other drawing requirements. On receipt, test that connector again and review nearby wall strength and fit. This is an illustrative workflow, not a DUX DUCIS test record.
Use explicit approval states
- Approved: the identified configuration meets the agreed release requirements.
- Hold for revision: list the failed or unverified requirements and the evidence needed before release.
- Limited approval: name the features or activities permitted, the unresolved items and the restrictions. Approval of logo artwork alone must not be read as approval of the complete case.
If accepting a deviation, document its exact scope and expiry or lot limitation. Decide whether it changes the ongoing specification. Avoid a broad “approved with comments” status that leaves the factory guessing which comments are mandatory.
Connect sample approval to production inspection
The approval record should point to the order, final drawings, component list, artwork, packaging and test reports. Name who can authorize changes. Require review of substitutions or process changes that could affect an accepted requirement, including resin grade, colorant, adhesive, coating, tooling and assembly details.
Agree how production will be checked separately. The plan should define the lot, sampling method, defect categories, acceptance and rejection rules, and the handling of failed results. NIST’s explanation of acceptance sampling describes selecting a random sample to make a decision about a lot. That is a different decision from approving a development reference.
If an AQL-based plan is used, identify the agreed standard, inspection level, lot size and applicable acceptance numbers. An AQL value alone is not a complete inspection instruction or a promise that every shipment contains no more than that percentage of defects. Consider a pilot or first-production review where repeatability remains uncertain, and state who releases the next stage.
What to send with the final approval request
Send one controlled package with the sample IDs, completed checklist, issue log, final specifications and the proposed release decision. Highlight anything not tested. Confirm which variant combinations are covered and which need their own review before they enter the production order.
For a DUX DUCIS project, send your device list and sample requirements with the artwork, intended packaging, target quantities and requested milestones. Ask for confirmation of the proposed sample configuration and any differences from planned production. Keep the final approval tied to that response and the accepted revision.
Frequently asked questions about OEM phone case sample approval
1. What should an OEM phone case sample approval include?
Record the exact device and case SKU, sample revision, material and finish, approved artwork, packaging version and test evidence. Attach the acceptance criteria and a list of closed or outstanding issues. The final decision should name the approver, date and production scope, so the factory knows which configuration it may make.
2. Is an approved sample enough to control mass-production quality?
No. Keep the approved sample as a physical reference, but also agree written specifications and a production inspection plan. A sample cannot communicate every tolerance, concealed material or test condition. Production inspection checks a defined lot against those requirements; it has a different purpose from approving a development sample.
3. Can photos replace a physical pre-production sample?
Photos can support artwork and visible defect reviews, but they cannot establish button feel, retention, material behavior or complete device operation. Use a finished physical sample on the intended handset for final functional approval. If remote review is unavoidable, record what remains unverified and keep the affected production release on hold.
4. How many samples and revisions should a buyer request?
Agree the quantity around the variants, tests and retained references you need. Destructive testing requires separate units, and a range with several device geometries needs model-specific coverage. The number of revision rounds depends on the unresolved issues. Close each issue with evidence rather than approving because an expected number of rounds has passed.
5. What should happen when a revised sample fixes one defect but creates another?
Keep the revision on hold and add the new defect to the issue log. Verify the original correction, then repeat checks affected by the change. For example, a harder button component may improve feedback but change installation or button preload. Approval applies to the complete revised assembly after the relevant checks pass.
6. Can a buyer approve a sample with minor cosmetic differences?
A buyer can accept a defined cosmetic deviation if it is acceptable for the intended product and documented precisely. Identify the affected SKU, deviation, evidence and whether acceptance applies only to a specific lot or changes the ongoing specification. Do not use a cosmetic waiver to leave functional failures or unsupported product claims unresolved.
7. Which changes require sample reapproval?
Require review when a change could affect an approved requirement, including tooling geometry, material grade, colorant, coating, adhesive, magnet assembly, logo process or packaging. The review should decide whether document approval, a replacement sample or repeat testing is needed. Keep production on the last approved configuration until the relevant change is released.
8. What should a buyer send DUX DUCIS for a sample review?
Send the phone-model and SKU list, target quantities by variant, drawings or reference designs, material and color requirements, logo files, packaging artwork and intended product claims. Include your acceptance checklist, required evidence and requested milestones. Ask which features the proposed sample represents and which production details still need confirmation.