



Phone Case USB-C Port Clearance: 6 Sample Checks
Phone case USB-C port clearance is the space that lets a cable or accessory reach the phone’s connector without its housing being blocked by the case. For an OEM order, check the opening’s shape, the depth around the port and the assembled fit with each accessory you intend to support. A charging cable that fits does not establish compatibility with a direct-plug microphone, angled connector or desktop dock.
Start with a supported accessory list. Then ask the case supplier to review that list against the exact phone model and case design. Keep the list in the product brief so purchasing and your listing team know which connections have been checked with the case on.
Where a USB-C case opening can interfere
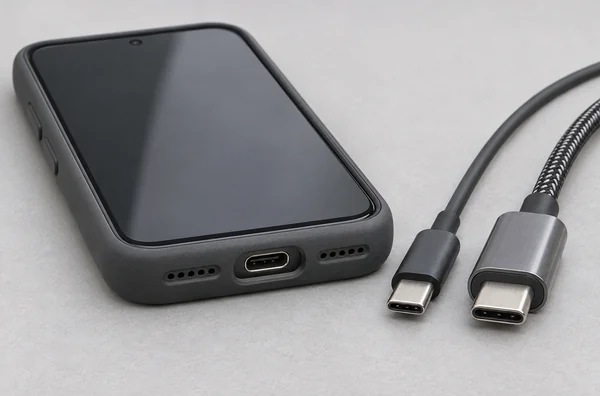
The metal USB-C plug is only part of the connection. Behind it is a wider housing, sometimes called an overmold on a molded cable end. A rigid accessory may have its own body immediately behind the plug. Those parts need room as the connector enters the phone.
An opening can look generous from below yet still stop the housing at its inner edge. A rounded opening may clear the middle of a rectangular connector but touch its corners. A thick bottom rim can also leave the phone’s port recessed relative to the outside of the case, so the housing reaches the rim before the connector reaches its normal seated position.
Enlarging the opening may solve corner contact while leaving a housing blocked by the outer bottom surface. A front-facing product photo rarely shows where the interference occurs.
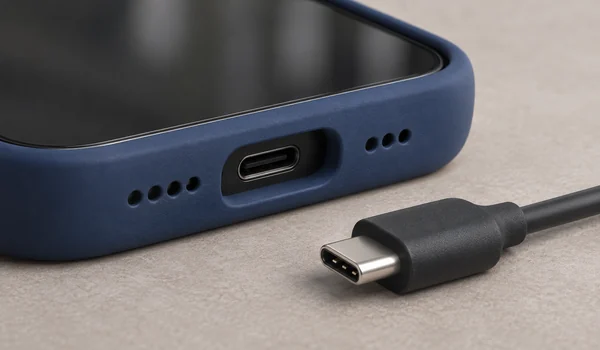
Ask for an underside view and a side view of the fitted case. For a new design, request a section drawing through the port area with the phone in place. That drawing should make the case wall, opening profile and phone-port position understandable without guessing from a rendering.
Build the accessory list before discussing cutout size
Choose accessories around the intended customer use. A retail case sold with a cable needs that cable identified. A case aimed at mobile creators may need a microphone receiver and external-storage connection checked. A business deployment may depend on a charging cradle already installed at the customer’s workplace.
The list should name the manufacturer, model or SKU and revision where available. Keep an identified physical example of each required accessory. Descriptions such as “standard cable,” “thick cable” and “USB-C dock” leave too much room for substitution.
| Accessory | Where interference can occur | What to check with the case fitted |
|---|---|---|
| Straight charging or data cable | Housing width, height, corner shape or shoulder at the cutout | Normal seating and removal, with enough room to grip the housing |
| Right-angle cable | Elbow body against the bottom rim; cable exit against the back or front edge | Each intended plug orientation and the actual cable route |
| Direct-plug microphone receiver or adapter | Accessory body contacts the case before the connector seats | Body clearance, secure connection and the accessory’s required operating function |
| Plug-in power bank | Battery body, connector hinge or shoulder contacts the case | Fit and handling in the configuration required by the accessory maker |
| Dock or charging cradle | Case bottom, back thickness or side rails prevent the phone reaching the dock connector | Complete phone-and-case seating in the cradle, not just plug entry |
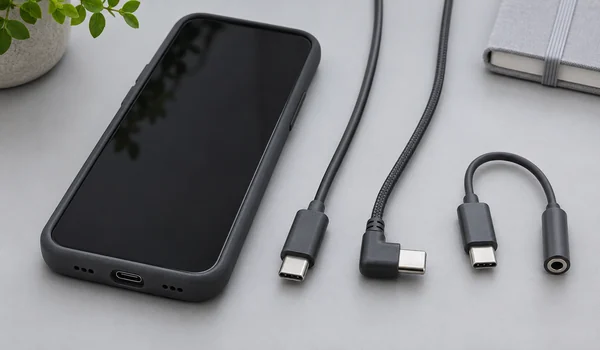
Accessory makers publish case restrictions for a reason. RØDE’s Wireless Micro connection guidance says some thicker or rugged cases can prevent its receiver from connecting securely. It advises removing an obstructing case or using one that allows the receiver to connect.
Anker also gives product-specific case limits: its A81L6 right-angle cable FAQ states up to 3 mm, while the A1653 Nano power-bank page states up to 4.9 mm. These are limits for those accessories, not universal phone-case dimensions. They illustrate why one cable cannot represent every USB-C product.
Describe the geometry the supplier needs to review
Specify more than the opening width. Ask the supplier to mark the relevant dimensions on a drawing and explain how they will be checked on the finished part. Use the handset maker’s current information for the exact device. Apple’s accessories design resources provide access to its design guidelines and device dimensional drawings; Apple also instructs accessory developers to test prototypes against the applicable requirements.
For the port area, the drawing discussion should cover:
- The opening’s usable width and height, including corner radii and any narrowing toward the phone.
- The depth between the case’s outside bottom surface and the phone’s port entrance, with the phone fully seated.
- The space around the plug housing and shoulder along the insertion path.
- Nearby features that affect access, such as a port cover, strap tab or projecting bottom edge.
Reference every measurement to a defined surface. “Case thickness” could mean the back panel, the bottom wall or the total distance added around a recessed port. Ask where an accessory manufacturer’s stated case-thickness limit applies before using it as a design requirement.
A rectangular connector outline also needs its corner shape and orientation recorded. Two housings with similar maximum width and height can meet a rounded opening differently. Use measured accessory samples or manufacturer drawings where available, and record the measuring method. Keep probes and caliper jaws out of the phone’s connector.
Set the cutout profile and dimensional tolerances on the agreed engineering drawing. The usable space depends on the phone, case construction and required accessories. If the proposal is to enlarge the opening, review how much bottom-edge material remains and whether other case requirements need checking again.
Check the assembled fit without forcing the connection
The following is a proposed buyer review sequence. Agree its details with the supplier and accessory provider; it is not a standardized USB-C test or a claim about testing already performed by DUX DUCIS.
- Confirm that the correct phone is fully seated in the correct case. Check for a lifted corner, misplaced liner, closed port cover or another part changing the bottom opening.
- Establish how the identified accessory normally connects to the same phone without the case, following the device and accessory instructions. Record a clear side-view reference where useful.
- Fit the case and approach the connector straight. Stop if the housing meets the case before the expected seated position, the connector sits at an angle or unusual resistance appears. Do not force it, lever it sideways or trim the sample to create a pass.
- Inspect the seated assembly from below and from the side. Look for premature housing contact, case distortion or a connection that relies on holding the cable in a particular position.
- Check normal removal by gripping the connector housing. If the opening traps the housing or makes removal impractical, record that separately from insertion.
- Run the intended function with the phone and accessory supported as their instructions require. Keep the cable in its normal use position without pulling or side-loading the port.
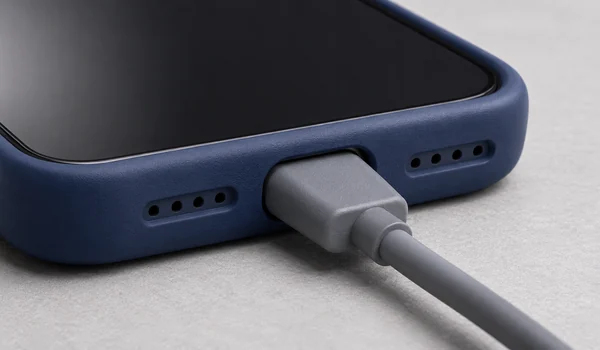
Do not use a universal “flush fit” rule. Some connectors have a visible gap in their normal seated position. Compare with the accessory’s expected fit and the case-off reference. If contact is hidden inside the cutout, use appropriate inspection equipment or ask the supplier to demonstrate the section geometry rather than pushing harder.
For a right-angle connector, record the directions the cable can face. A reversible USB-C plug does not make the surrounding elbow or case shape symmetrical. One orientation may clear the case while the opposite orientation catches a rim.
Separate physical fit from charging, data and audio results
A plug can clear the case and still fail to perform the intended task. Apple’s USB-C connection guidance for iPhone distinguishes charging, data transfer, audio and display connections. It also explains that cable capabilities and supported phone models affect those functions. Use that distinction in the review record.
For a charging-only bundle, define the charging check you need and identify the power source. For a data accessory, confirm the intended data operation. For a microphone receiver, confirm that the intended application receives audio. A charging icon does not demonstrate a working data link or microphone connection.
If an accessory fails with and without the case, investigate the phone, cable, power source and accessory requirements before blaming the cutout. If it works without the case but repeatedly fails when fitted, record the physical differences. Use those observations to locate the interference before requesting a design change.
Wireless charging needs its own review. A magnetic accessory attaching to the back says nothing about wired USB-C clearance. Use the separate OEM magnetic phone case compatibility guide when the product brief includes magnetic attachment or wireless charging.
Give docks and detachable cases their own configurations
A dock can fail before its connector reaches the phone. The case may sit on the cradle’s edge, its back may hold the handset too far forward, or a bottom projection may change the insertion angle. Checking a loose cable outside the cradle misses these constraints. Inspect the whole dock with the case fitted, including any manufacturer-specified support or adjustment.
For a detachable wallet design, decide whether wired use must work with the wallet attached, with the inner case alone, or in both states. These are separate configurations. Include any strap tab or other intended add-on that sits near the port rather than checking an incomplete assembly.
For example, DUX DUCIS lists the Lawa wallet case for iPhone 17 Pro as a detachable wallet and TPU+PC phone case. That construction gives a buyer two assemblies to consider. The product description does not establish clearance for a particular USB-C receiver, cable housing or dock; those combinations still need review.
Define the supported connection precisely
Record what each connector can do with the case fitted. A note such as “charging OK” can hide a housing that presses on the case or a plug that needs repeated adjustment. Keep the result specific enough to identify a changed housing or a different use position.
| Connection detail | What the record should show |
|---|---|
| Accessory and housing | Exact accessory model and connector version, with an underside or side photo of the fitted connection |
| Interference location | Whether the housing corners, shoulder, elbow or accessory body meet the case before normal seating |
| Direction and assembly | Permitted plug directions, cable route, dock adjustment and any detachable case parts used |
| Access and operation | Insertion and removal result, plus the named charging, data or audio function checked |
| Supported scope | The exact phone-and-case combination; any requirement to remove the case; functions or accessories left untested |
If an accessory only works after removing the case, state that condition. Purchasing must decide whether it meets the brief before the listing describes it as compatible. Keep the connection details with the wider OEM phone case sample approval checklist, which covers the general approval record.
What to send with an OEM enquiry
Send the exact phone models, preferred case references and required accessories before requesting a port-opening change. Include photos of the connector ends, available drawings and the intended use position. Mark which combinations must work with the case on. Ask whether an existing design can accommodate them or whether a geometry change needs assessment.
DUX DUCIS accepts buyer-defined case and private-label enquiries through its OEM and ODM service; options depend on the selected model, material and order. Send the team your phone, case and accessory list to establish which combinations can be reviewed and which samples or drawings are needed.
If the accessory supplier later changes the connector housing, check the fit again before continuing to use the same compatibility wording.
Frequently asked questions
1. What is phone case USB-C port clearance?
It is the space around the phone’s USB-C port that lets a plug and its housing reach their normal seated position with the case fitted. Review the opening profile and depth, plus room for the accessory body and normal removal.
2. Does a USB-C opening fit every USB-C cable?
No. The housing behind the plug can differ in width, height, corner shape and shoulder position. An opening that accepts one cable may obstruct another. Identify the cables included in your compatibility claim and check those exact models.
3. What size should the USB-C cutout be?
Specify the opening for the exact handset, case construction and intended connector housings. Use the handset’s design information and accessory samples or drawings to agree the opening profile and tolerances with the supplier.
4. Why can a slim cable fit when a microphone receiver does not?
A direct-plug receiver has a body close to its connector. That body may contact the case before the plug seats, even when a slimmer cable clears the opening. Check the receiver itself, including its required operating position.
5. Does successful charging prove accessory compatibility?
No. Record physical fit separately from the function you need. Charging does not demonstrate data transfer, audio operation or display output. Check the required function with the identified phone, cable or accessory and power source where relevant.
6. How should a right-angle USB-C cable be checked?
Check each intended plug orientation and cable route with the phone fully seated in the case. Look for elbow or shoulder contact and confirm normal insertion and removal. Stop if the connector needs force or sideways pressure.
7. Can a charging dock require a separate case check?
Yes. The dock’s cradle may interfere with the case bottom, back or sides before its connector reaches the phone. Check the complete dock assembly and any required adjustment. A loose cable test does not establish dock fit.
8. Should a USB-C plug sit flush against the case?
Not necessarily. Some connectors leave a visible gap when normally seated. Compare the accessory’s expected fit and its case-off position, and check for premature housing contact. Do not force a connector farther in just to eliminate a visible gap.